本投稿は TECOTEC Advent Calendar 2021 の5日目の記事です。
こんにちは。テコテックVPoEの八木です。 プログラミングが好きで夜な夜な色々と作ってますが、今回はその中から "iPhone のカメラで複数の QR を同時スキャン、結果を AR 表示するアプリのサンプル" をご紹介します。
まずは動画を。

これ、海外の有料系SDKの一部がまあまあ以前から機能を有していたりするのですが、今回はピュアな Apple のフレームワークのみで実現しようという趣旨です。 その場合でも、AVFoundation のみで実現する方法と、高度なコンピュータービジョンアルゴリズムを備える Vision Framework を組み合わせる方法がありますが、今回は基本の AVFoundation のみで実現する方法をご紹介します。 (Vision についても色々と試しているので、機会があればまた)
さて、早速中身の解説です。
プロジェクト構成
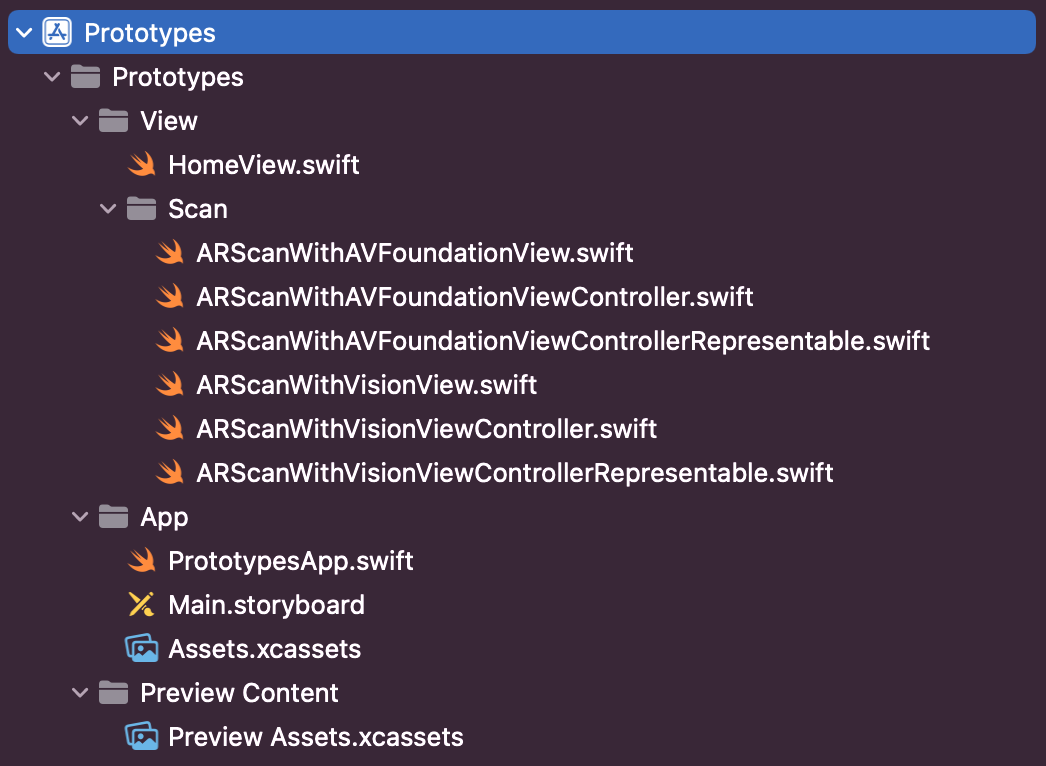
(ARScanWithVisionView で始まるものについては、今回は紹介しません)
HomeView
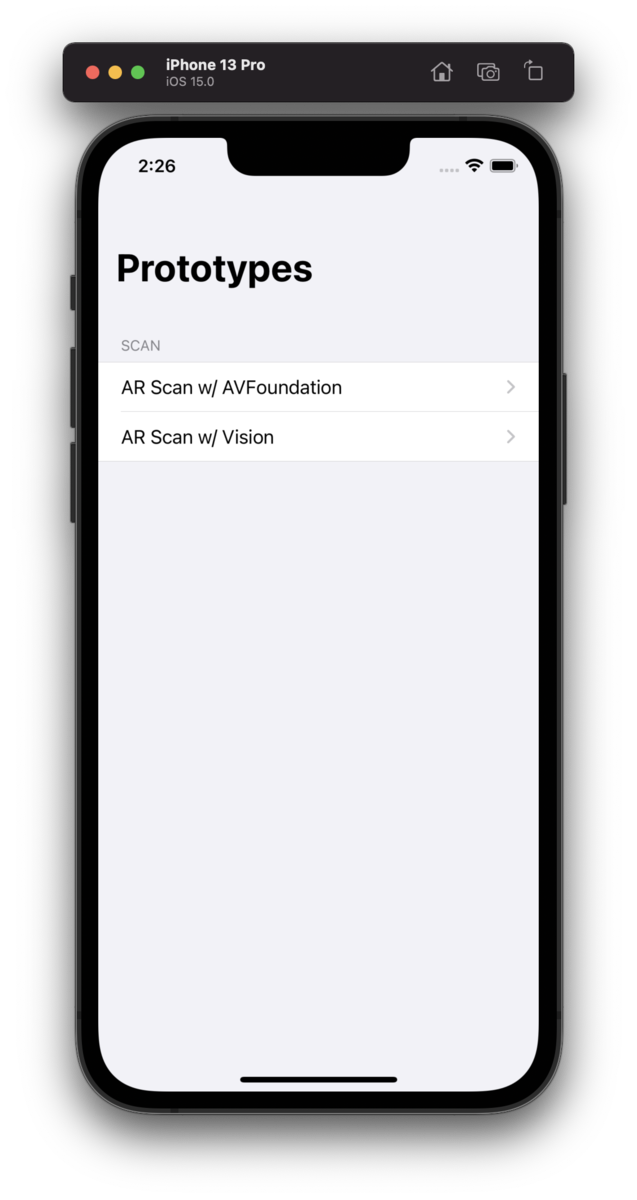
このアプリのホーム画面です。 SwiftUI で書いており、ARScanWithAVFoundationView, ARScanWithVisionView の2つのリンクがありますが、今回は AVFoundation の方をご紹介します。
import SwiftUI

struct HomeView: View {
    var body: some View {
        NavigationView {
            List {
                Section(header: Text("SCAN")) {
                    NavigationLink(destination: ARScanWithAVFoundationView()) {
                        Text("AR Scan w/ AVFoundation")
                    }
                    NavigationLink(destination: ARScanWithVisionView()) {
                        Text("AR Scan w/ Vision")
                    }
                }
            }
            .listStyle(GroupedListStyle())
            .navigationBarTitle(Text("Prototypes"))
        }
    }
}
SwiftUI について
Apple の Human Interface Guidelines に沿ったシンプルなアプリは SwiftUI を使うと本当にスピーディーに作れますね。 Storyboard との互換性もこれまでの経験上ではバッチリです。 しかし、SwiftUI 側の不具合や仕様変更がまだ割とあり、しばしば消耗します。 よって、C向けの複雑なものはもう少し待った方が良いかも知れません。 僕は SwiftUI で2つのアプリを開発しましたが、どちらも端末や使用用途を限定できるB向けでの採用でした。
ただ、これまでの xib, Storyboard の煩雑さから開放されるそのコンセプトと、それにより実現される開発スピードには凄まじいものがありますので、今後の安定化に期待です!(テコテック赤池による こちら の記事もぜひご参照ください)
ARScanWithAVFoundationView
import SwiftUI

struct ARScanWithAVFoundationView: View {
    var body: some View {
        ARScanWithAVFoundationViewControllerRepresentable()
            .navigationBarTitle(Text("AR Scan w/ AVFoundation"), displayMode: .inline)
    }
}
ARScanWithAVFoundationViewControllerRepresentable
UIViewControllerRepresentable により旧来の Storyboard, ViewController の仕組みと連携しています。
import SwiftUI

struct ARScanWithAVFoundationViewControllerRepresentable: UIViewControllerRepresentable {
    func makeUIViewController(context: UIViewControllerRepresentableContext<ARScanWithAVFoundationViewControllerRepresentable>) -> ARScanWithAVFoundationViewController {
        let storyboard = UIStoryboard(name: "Main", bundle: Bundle.main)
        let vc = storyboard.instantiateViewController(identifier: "ARScanWithAVFoundation") as! ARScanWithAVFoundationViewController

        return vc
    }

    func updateUIViewController(_ uiViewController: ARScanWithAVFoundationViewController, context: UIViewControllerRepresentableContext<ARScanWithAVFoundationViewControllerRepresentable>) {
        // nop
    }
}
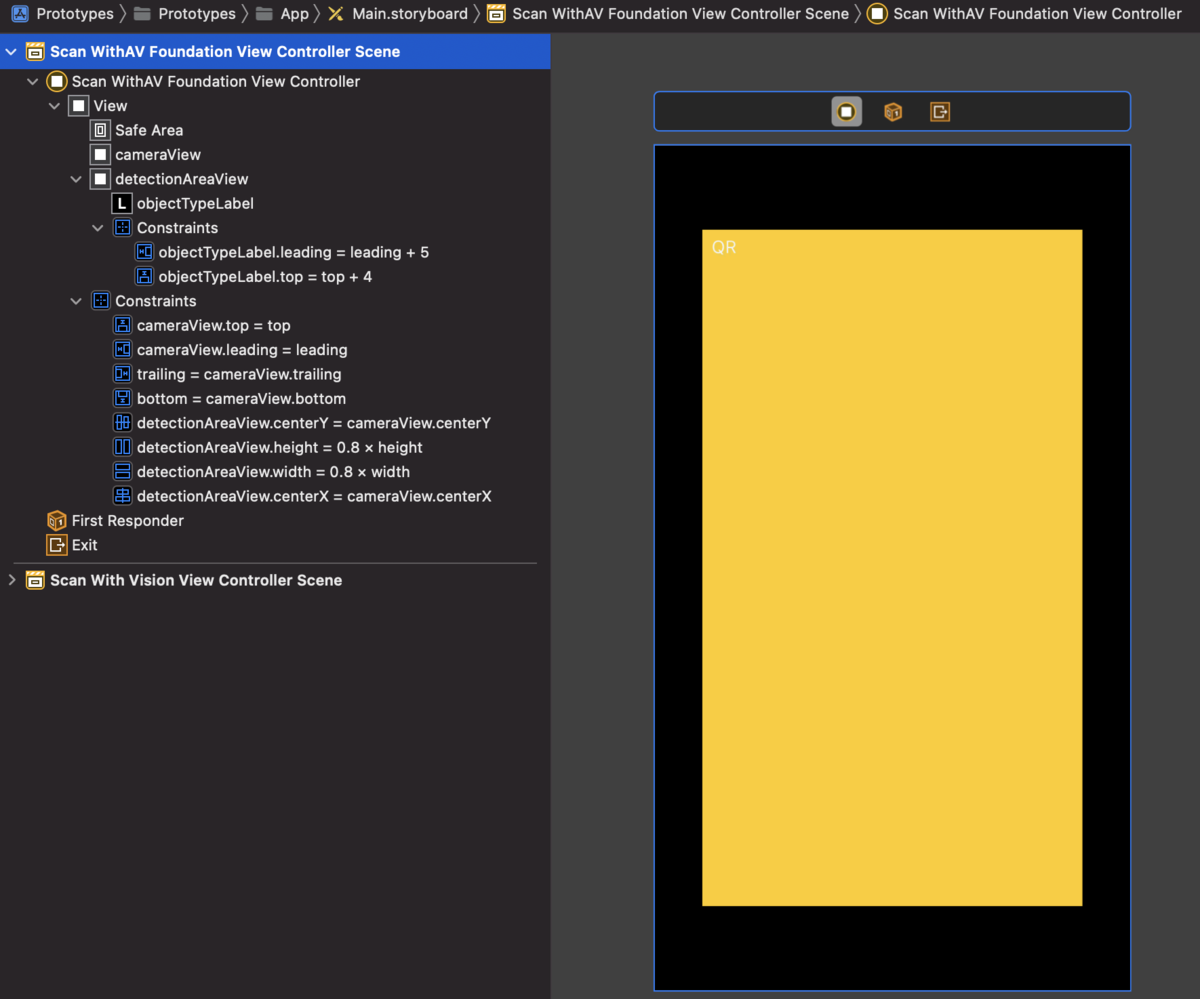
Main.storyboard
QR 検出エリアの constraint など設定しています。
ARScanWithAVFoundationViewController
AVFoundation を用いたスキャンの実装部分です。(リファクタリング未済)
import UIKit
import AVFoundation

class ARScanWithAVFoundationViewController: UIViewController {
    var previewLayer: AVCaptureVideoPreviewLayer!
    var captureSession: AVCaptureSession!

    @IBOutlet weak var cameraView: UIView!
    @IBOutlet weak var detectionAreaView: UIView!

    override func viewWillAppear(_ animated: Bool) {
        super.viewWillAppear(animated)

        setupCaptureSession()
    }

    override func viewWillDisappear(_ animated: Bool) {
        super.viewWillDisappear(animated)

        captureSession.stopRunning()
    }

    private func setupCaptureSession() {
        captureSession = AVCaptureSession()

        guard let captureDeviceVideo = AVCaptureDevice.default(for: .video) else { return }
        var captureMetadataOutput: AVCaptureMetadataOutput
        do {
            let captureDeviceInputVideo = try AVCaptureDeviceInput(device: captureDeviceVideo)
            if (captureSession.canAddInput(captureDeviceInputVideo)) {
                captureSession.addInput(captureDeviceInputVideo)
            }

            captureMetadataOutput = AVCaptureMetadataOutput()
            if (captureSession.canAddOutput(captureMetadataOutput)) {
                captureSession.addOutput(captureMetadataOutput)
            }
        } catch {
            let ac = UIAlertController(title: "Scanning not supported", message: "Your device does not support scanning a code from an item. Please use a device with a camera.", preferredStyle: .alert)
            ac.addAction(UIAlertAction(title: "OK", style: .default))
            present(ac, animated: true)
            captureSession = nil

            return
        }

        captureMetadataOutput.setMetadataObjectsDelegate(self, queue: .main)
        captureMetadataOutput.metadataObjectTypes = [.qr]

        previewLayer = AVCaptureVideoPreviewLayer(session: captureSession)
        previewLayer.frame = cameraView.layer.bounds
        previewLayer.videoGravity = .resizeAspectFill
        cameraView.layer.addSublayer(previewLayer)

        captureMetadataOutput.rectOfInterest = previewLayer.metadataOutputRectConverted(fromLayerRect: detectionAreaView.frame)

        detectionAreaView.layer.backgroundColor = UIColor.clear.cgColor
        detectionAreaView.layer.borderColor = UIColor.white.cgColor
        detectionAreaView.layer.borderWidth = 2
        detectionAreaView.layer.cornerRadius = 10

        captureSession.startRunning()
    }

    private func found(data: String, metadataObject: AVMetadataObject) {
        guard let transformedMetadataObject = previewLayer.transformedMetadataObject(for: metadataObject) else {return}

        // TODO: キャッシュ実装
        let traceView = UIView()
        traceView.layer.borderWidth = 3
        traceView.layer.borderColor = UIColor(red: 0.04, green: 0.56, blue: 0, alpha: 1.0).cgColor
        traceView.frame = transformedMetadataObject.bounds

        let contentLabel = UILabel()
        contentLabel.textColor = UIColor.white
        contentLabel.backgroundColor = UIColor(red: 0.04, green: 0.56, blue: 0, alpha: 1.0)
        contentLabel.text = data
        contentLabel.sizeToFit()
        contentLabel.frame.origin.x = traceView.frame.origin.x
        contentLabel.frame.origin.y = traceView.frame.origin.y - contentLabel.frame.height

        cameraView.addSubview(traceView)
        cameraView.addSubview(contentLabel)

        UIView.animate(withDuration: 0.25, delay: 0, options: [.curveEaseIn], animations: {
            traceView.alpha = 0
            contentLabel.alpha = 0
        }, completion: {(completed) in
            traceView.removeFromSuperview()
            contentLabel.removeFromSuperview()
        })
    }
}

extension ARScanWithAVFoundationViewController: AVCaptureMetadataOutputObjectsDelegate {
    func metadataOutput(_ output: AVCaptureMetadataOutput, didOutput metadataObjects: [AVMetadataObject], from connection: AVCaptureConnection) {
        for metadataObject in metadataObjects {
            guard let readableObject = metadataObject as? AVMetadataMachineReadableCodeObject, let stringValue = readableObject.stringValue, !stringValue.isEmpty else { return }
            found(data: stringValue, metadataObject: metadataObject)
        }
    }
}
このままでもCPU使用率は低く、割とサクサク動いていますが、TODO 部分はキャッシュを実装する予定です。時間を見つけて片付けたいと思います。

おわりに
以上、今回は AVFoundation のみで実現した "iPhone のカメラで複数の QR を同時スキャン、結果を AR 表示するアプリのサンプル" をご紹介しました。AR 表示部は色々と工夫できますので、活用用途も幅広いと思います。
実装面については、正直バーコードスキャナ程度なら古典的な AVFoundation でも十分な感がありますが、Vision を使うと Text Recognition, Image Classification, 合わせ技の OCR なども実現できますので、機会があればまたご紹介します。
お読みいただきありがとうございました!
ザッツ・オール!!